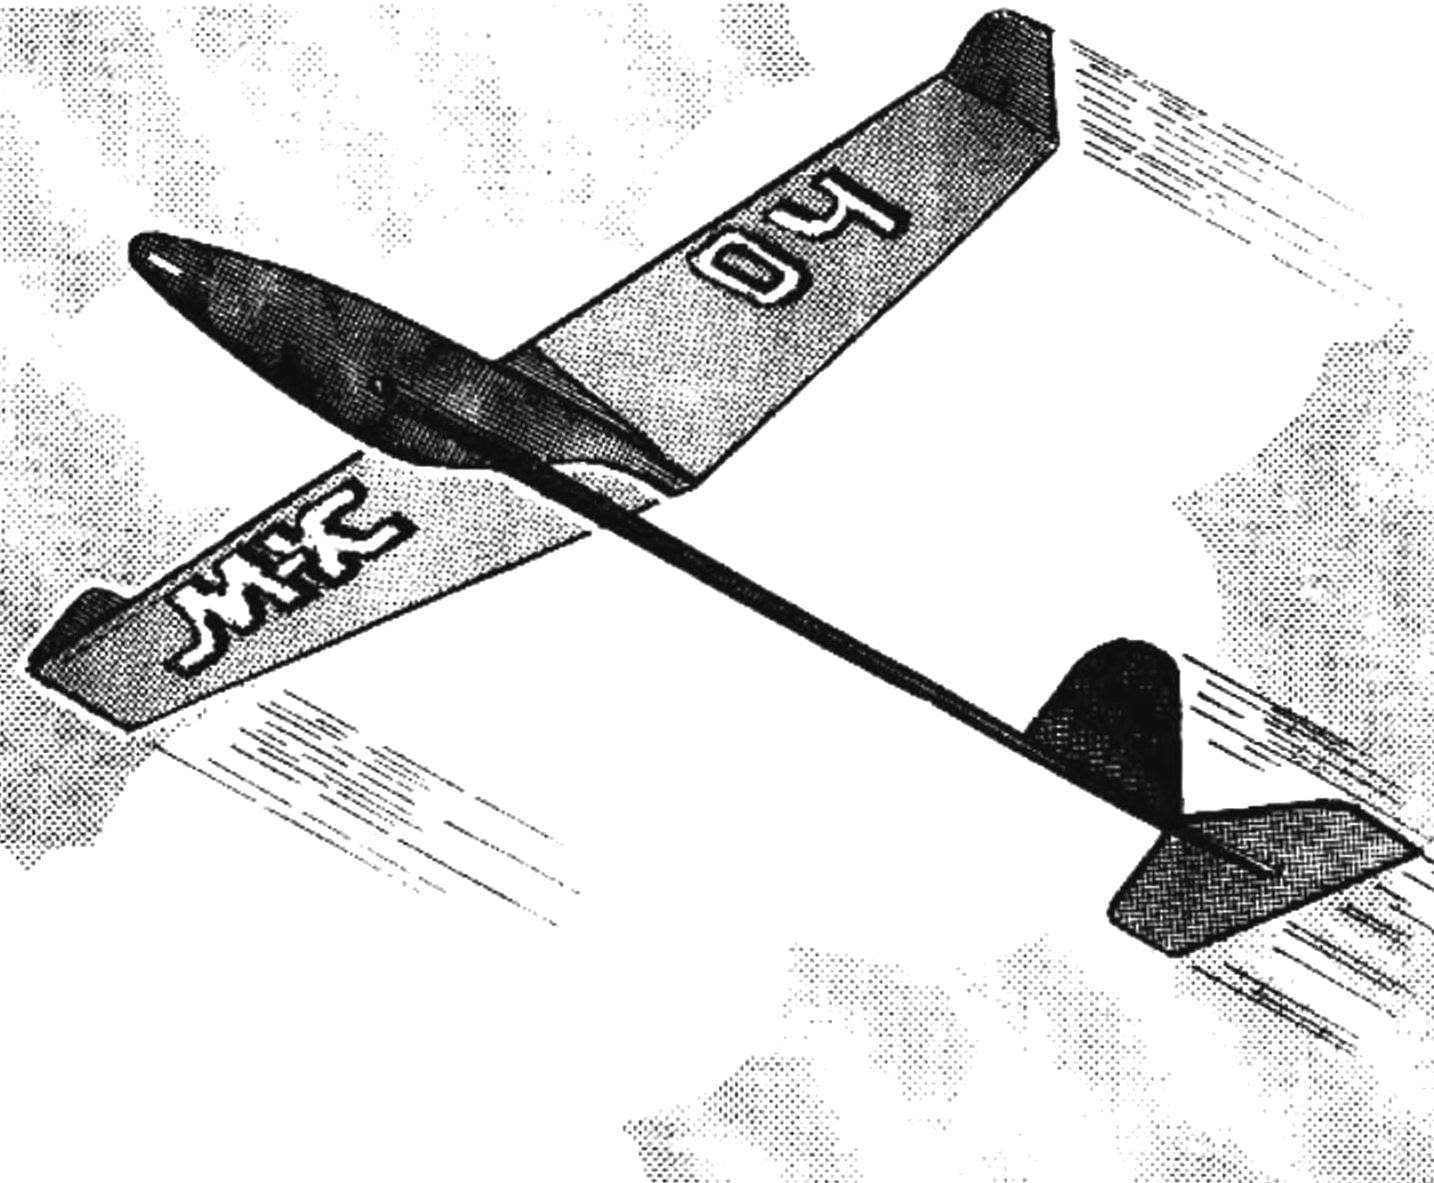
 Throwing gliders are very popular among novice modelers. The fact that the technological and constructive simplicity, these miniature models have performance of more complex models. Miniature aircraft when you start the cast can climb more than 20 meters, they held steady in the “thermals” and sometimes depart quite far from the start.
Experienced athletes at the prestigious event, collect throwing gliders mostly balsa, but for beginners can be recommended more available and cheap materials such as foam, plywood and pine.
Today we acquaint readers with the design is very “volatile” and missile airframe, all surfaces of which are made of melkosortnogo packing foam.
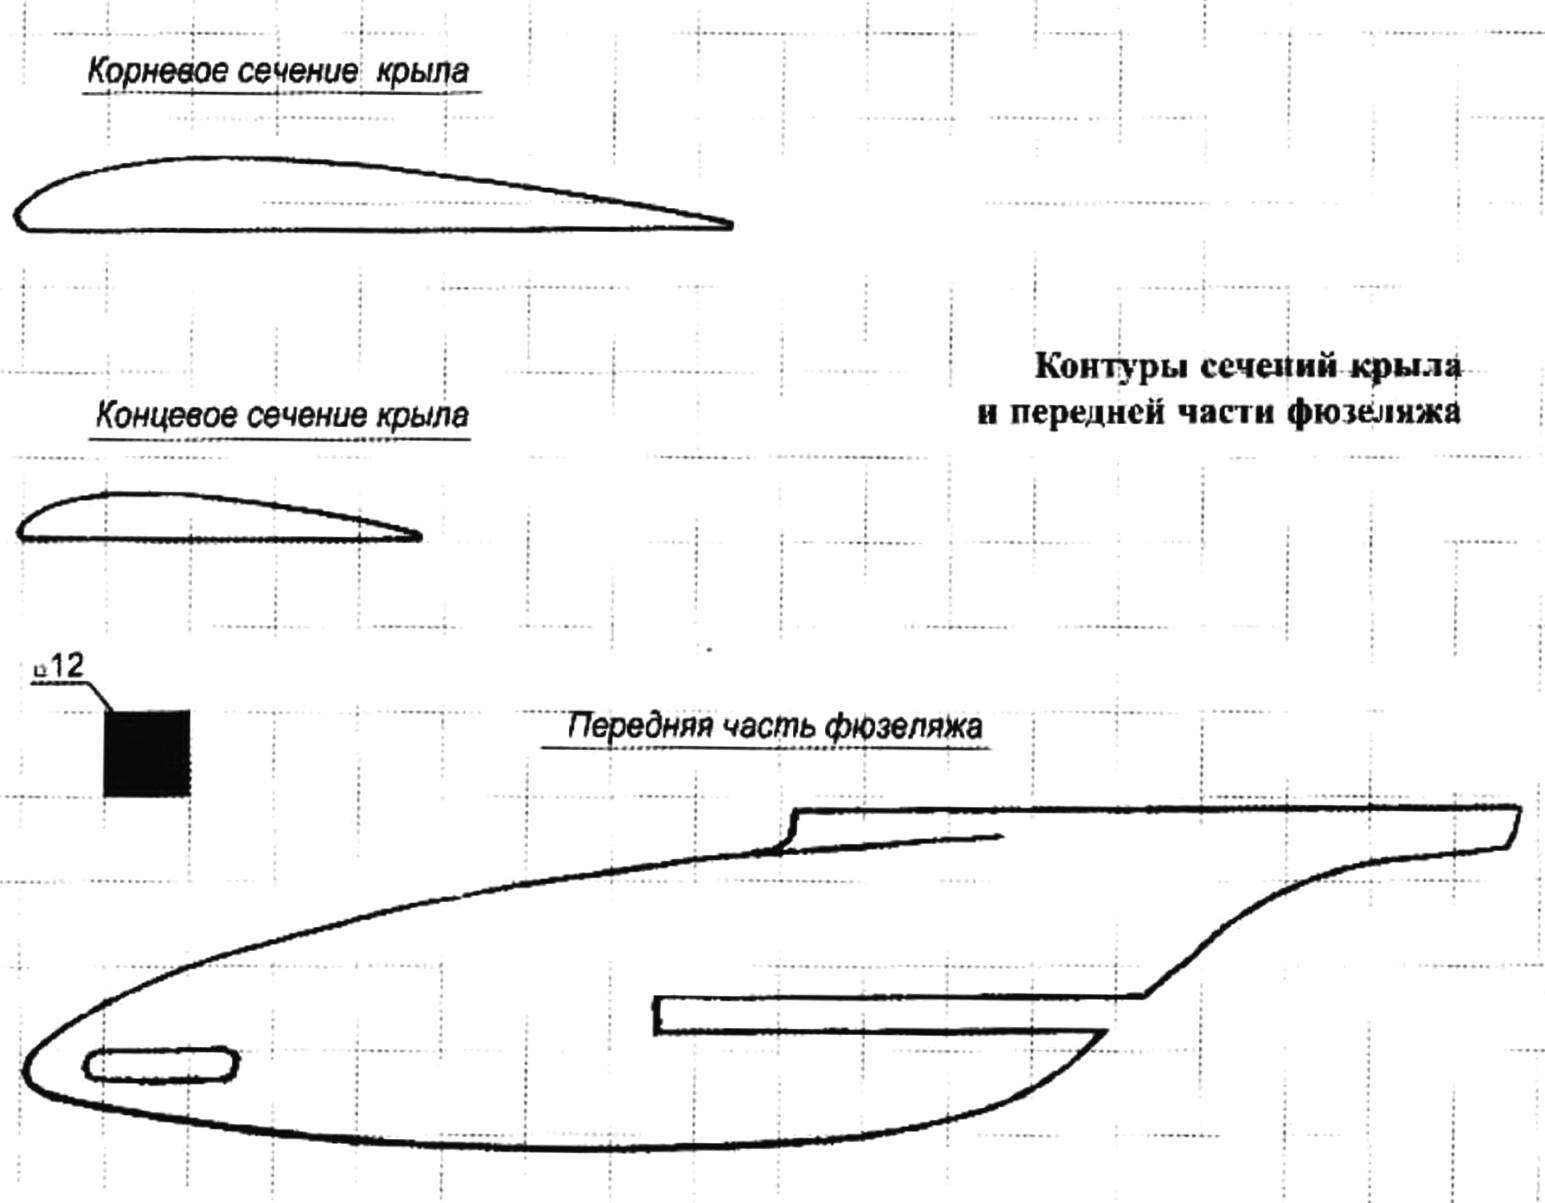
The fuselage of the glider is a pine beam of variable cross section is 4×4 mm in the front and 3×3 mm at the rear. The place to start is to whittle rail section 4×4 mm, and then sandpaper glued on Board, soshlifovat it to the desired size.
The front part of the fuselage is cut from plywood, thickness: 3 mm After the cutting of the workpiece detail zashlifovyvayutsya skin. Fuselage beam embedded in the fuselage and fixed it with epoxy glue. In the nose, cut a groove 3 mm wide, in which is fixed a lead balance weight.
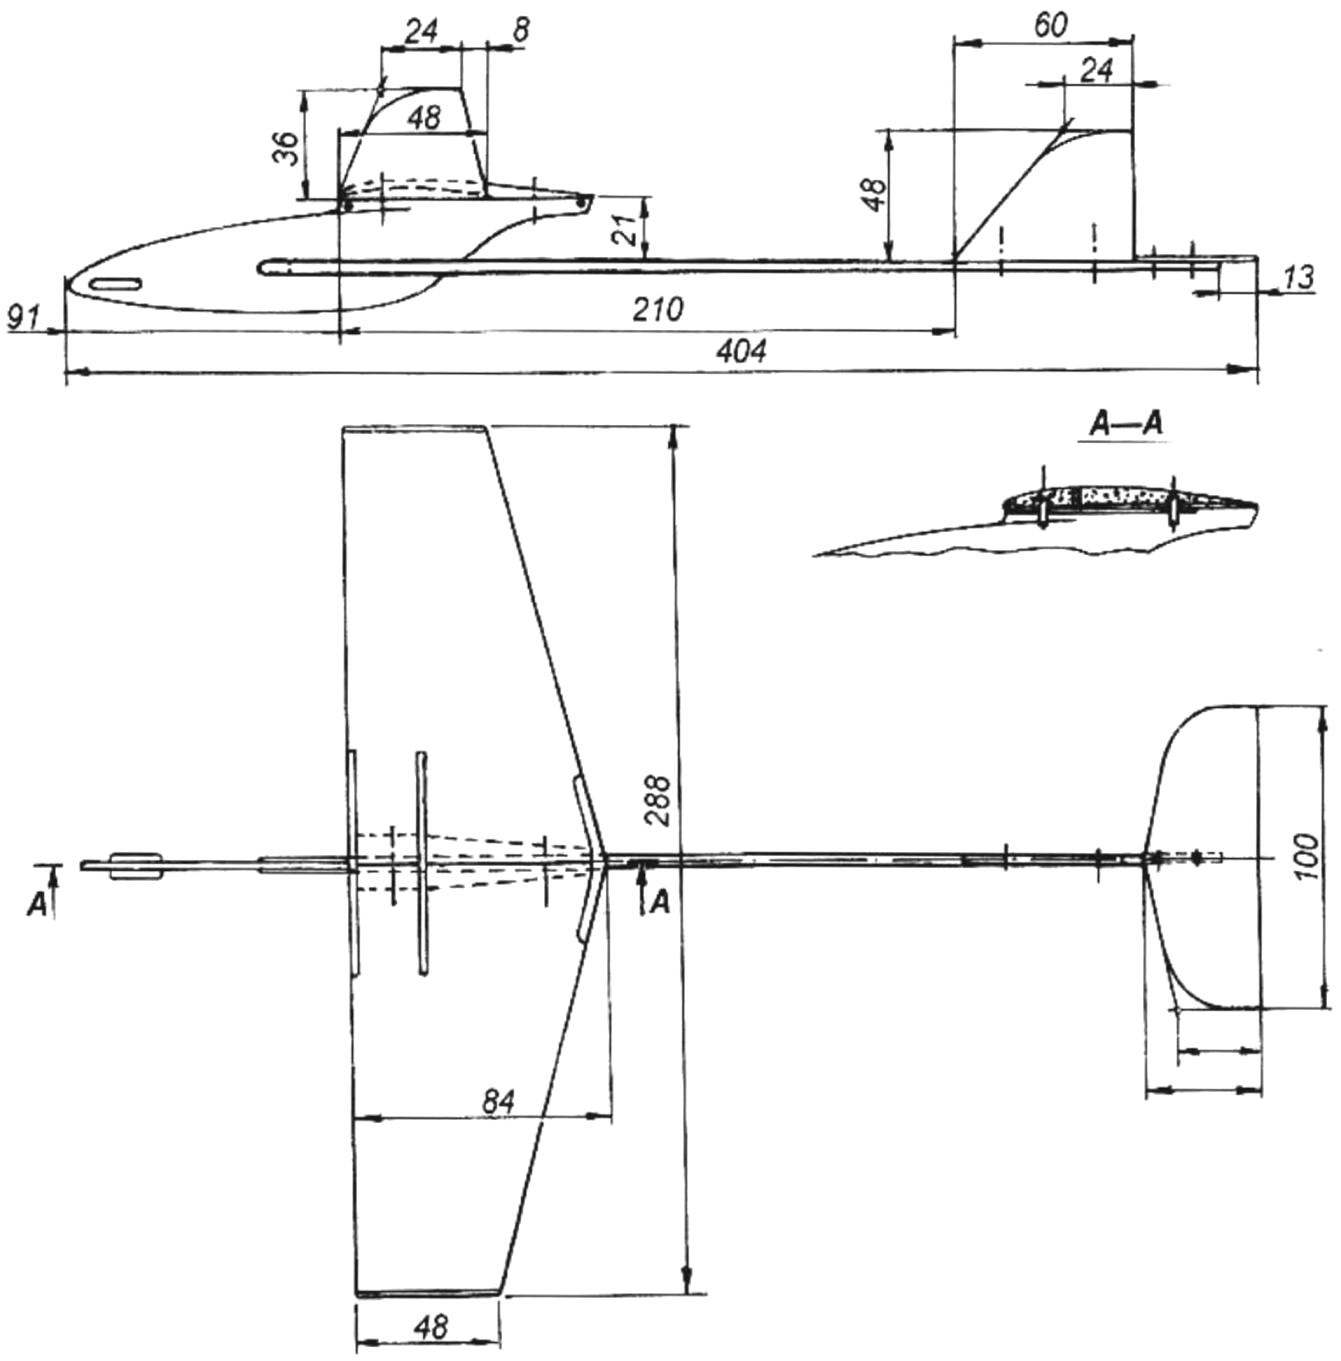
The geometric scheme of throwing glider
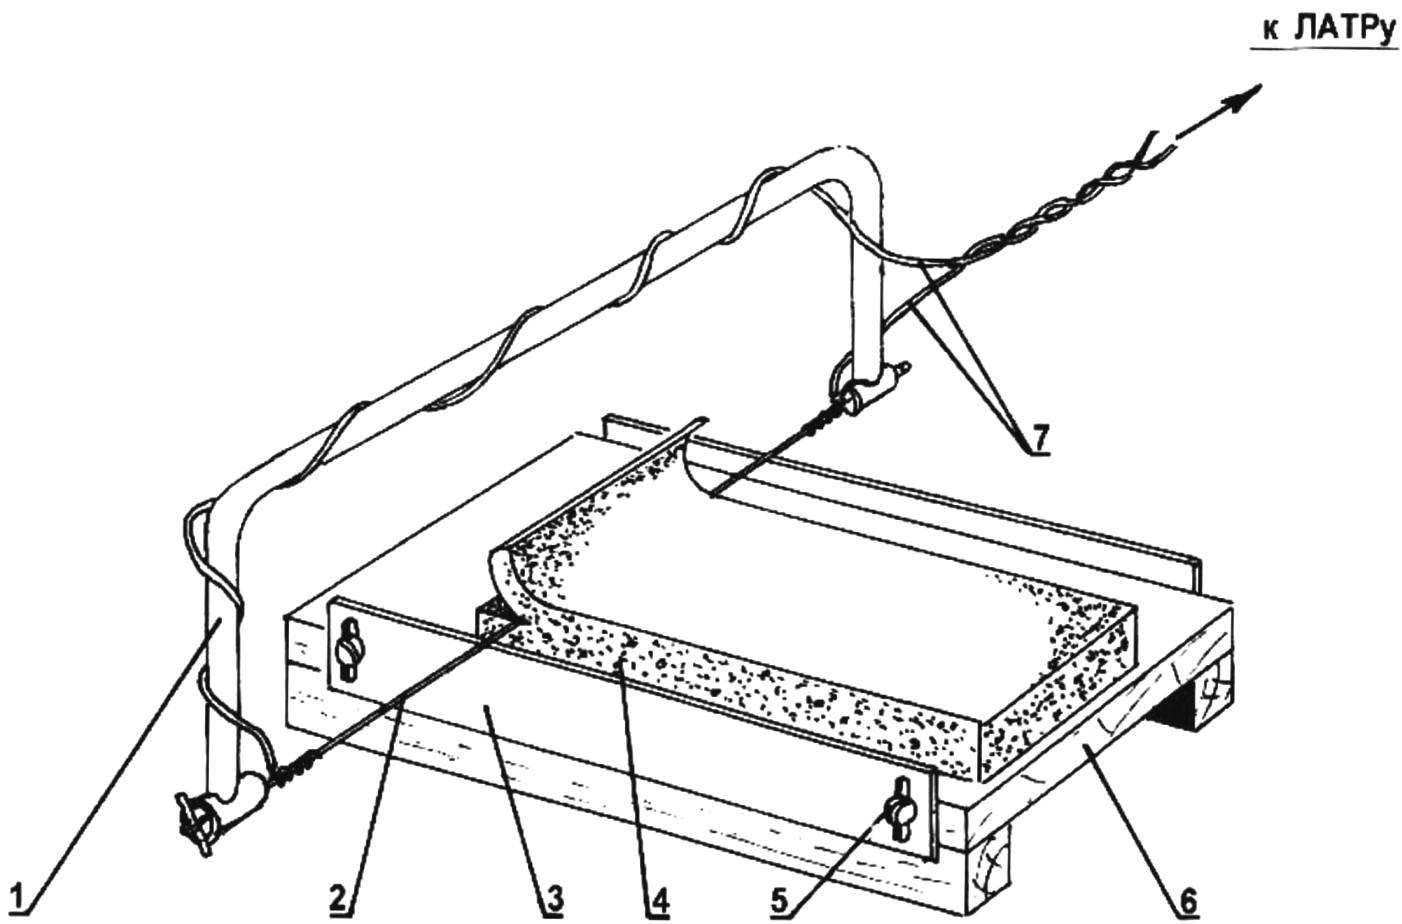
Wing cut from foam using a nichrome wire, glow or electric shock. The string is fixed to a homemade wooden stanochek, made by the type luchkovoj saws using ceramic insulating bushings. For the selection of the current value when the work string preferably using Later or rheostat. The amount of heat the strings and the speed of its movement are selected empirically, the main criterion is the quality of the surface — it should be smooth, covered with a glassy crust.
To obtain a wing of a given profile it is necessary to use the simplest slipway consisting of a wooden base and a pair of dural templates of the airfoil, the root and the end, fixed by screws at the ends of the base. When cutting the string must simultaneously touch the root and end of the templates. Please note that the wing is composed of left and right polacrilin, stacked with three plates of plywood of 3 mm thickness and epoxy adhesive. At the ends of the wing are fixed foam end plate — thickness 3 mm.
In the lower part of the wing, in the area of the symmetry plane are pasted reinforcing plates out of plywood with a thickness of 1 mm. On the front of the fuselage is fixed with epoxy glue docking site. Fixation of the wing — using two wooden dowels (the same sticks-toothpicks), mount — rubber ring.
Stabilizer and fin of the glider are flat foam plate 3 mm thick. Method of their production is virtually identical to the fillet of the wing — with the only difference that instead of the wing profile templates are used duralumin straight line. In the manufacture of flat Styrofoam plates used string enshrined in the stanochek from the old metal hacksaw; nichrome wire thus insulated from stanochek with Teflon bushings. The attachment of fin and stabilizer to the fuselage beam is produced with an epoxy adhesive with strengthening of the joints with a pair of wood studs is more convenient to use for this purpose wooden sticks-toothpicks.
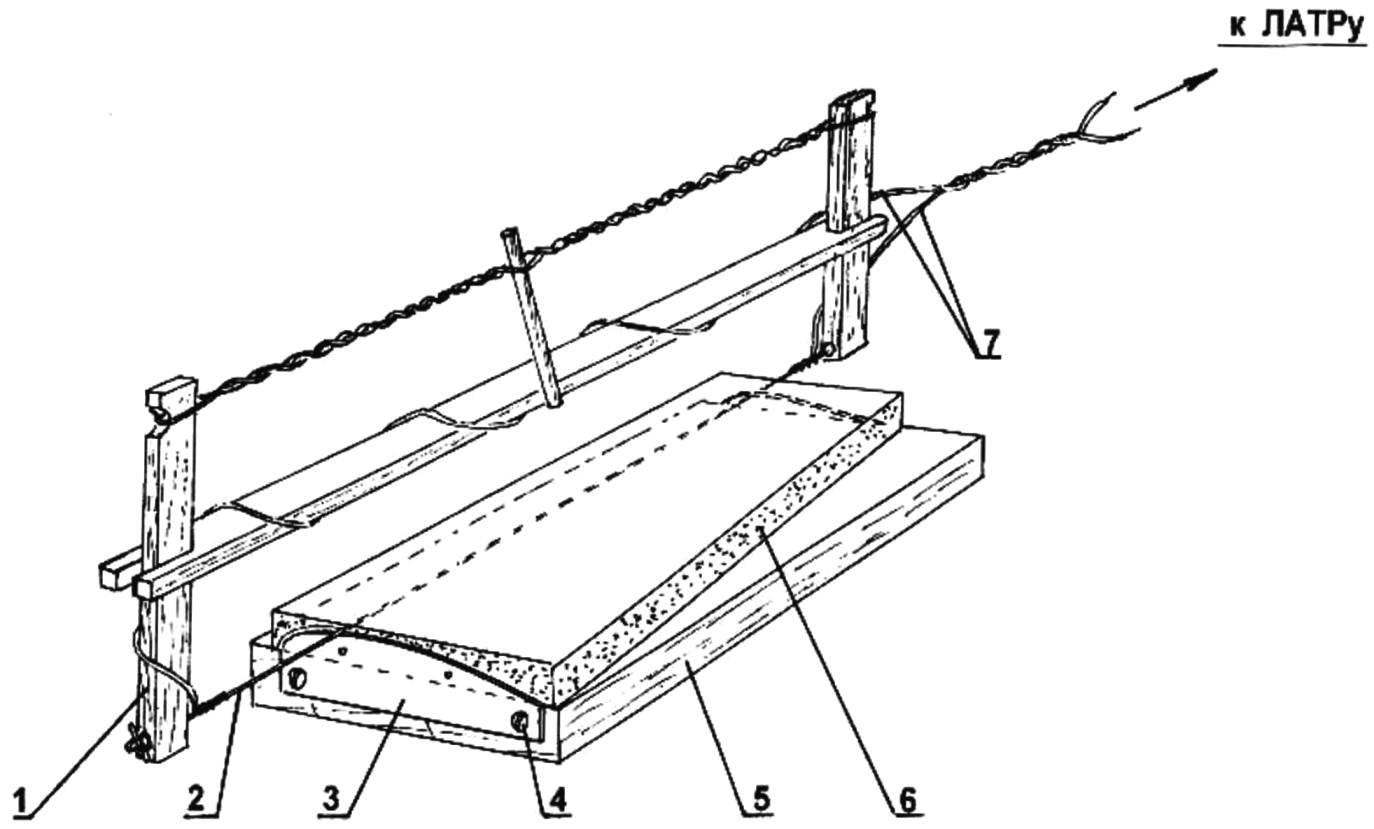
Manufacturer foam throwing glider wing:
1 —a wooden machine tormaresca; 2 — reguli element (nichrome string); 3 — template of the root section of the wing (aluminum); 4 — screw; 5 — base of the pile; 6 — foam billet wing
Manufacturer of flat plates-pieces of foam:
1 — machine termoresta (from metal type); 2 — nichrome string; 3 — line (aluminum); 4 — Styrofoam billets; 5 — screw; 6 — stapel
Alignment of the model is performed using pieces of tin or lead, is laid in a hole in the head part of the airframe. When the center of gravity coincides with the point on the wing, corresponding to 30% of chord, pieces of tin or lead alloys and the weight is fixed in the hole with the help of its easy clinching.
The model is preferably adjusted to soaring through the bend with a diameter of not less than 20 m. the adjustment of the model parameters is performed by folding the rear part of the stabilizer and fin — you can use a soldering iron, putting its tip to the axis of rotation of the imaginary of the rudder. Keep in mind, if after a throw the model goes into a dive, it means that the alignment of the front glider too, if you pitch up model, is clearly behind the aerodynamic focus of the wing of the glider. When you debug the model the main thing — to achieve a smooth transition of its trajectory from the ascent to the planning or soaring.
To get the maximum flight time, you should master the technique of execution of the throw. As a rule, the throw is short run, while throwing at the same time participate hand brush and, importantly, the index finger of the right hand.
I. SILVER
Recommend to read
 BOOKCASE-RETRO
When a small room for a student or a student does not establish a standard store-bought furniture because of its size, the solution may be compact and simple construction, proposed by...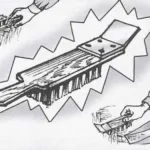 TREATMENT OF PARQUET FLOORING
When handling the old or new parquet flooring and top-selling tools — sanding to give the wood a smooth surface Yes the brush to clean the treated area from fine dust to see the result. ...
